Showing posts with label invitations. Show all posts

Thursday, July 16, 2009

saying thanks: it's gotta be cute!

When I was in the conception stage of all of my stationery/paper products for the wedding, I was determined to have a unified theme running through everything--from the invitations to the menus, programs, and even thank you notes!

Just before the wedding, I decided that I didn't want to cut another piece of paper for the rest of my life, so I outsourced my wedding thank you notes.

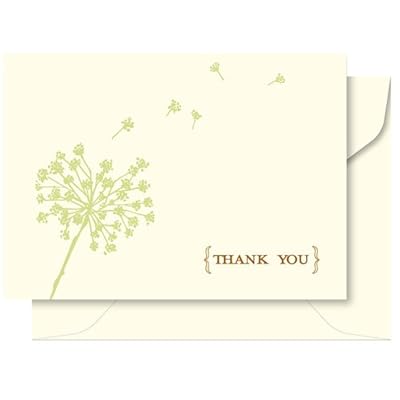
I almost forgot about them until I unpacked the cuteness that is our (almost) corresponding thank you notes, compliments of target!
Adorable, no?


and pretty close to our invitations, no?


This past week I've been going through the stack of wedding cards and gifts and preparing to write almost 100 thank you notes, and I realized we have no return address labels!

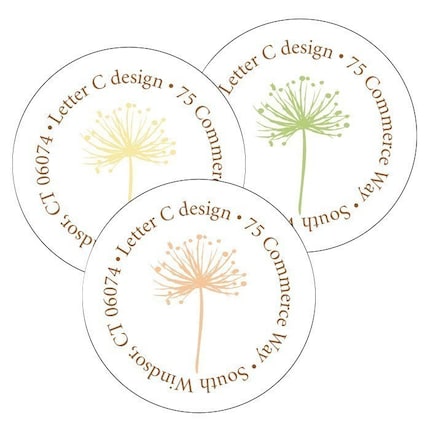
Rather than do it the easy/ugly way (print address text onto Avery labels via Microsoft Word), I decided to check out etsy's selection of address labels, and got totally overwhelmed.

After an hour, and about 25 more 'favorites', I saw it! Etsy seller, lettercdesign has an adorable round address surrounding.--you guessed it--a dandelion! I immediately placed an order for the green one and I can't wait to see what they look like with our names together and our new address!


Cindy has lots of other cute circular address label designs. I was just drooling over this one! Check out her shop!


In the meantime, my hand will busily working on those thank yous!

Tuesday, May 12, 2009

DIY Tutorial: Invitation--a lot of love and papercuts

The final installment in my invitations series....

[previously]
Christie, my cousin and graphic designer explained her end
now for the nitty gritty!

I started with this: Superfine white envelopes, cardstock and text stock, and sage A7 cards from Paper Source, and chocolate brown pocketfolds from Paper and More

I ordered the paper-source A7 cards in sage to fit in the center of the pocketfold, but beware! They were just slightly too big, and the pocketfold bubbled when I tried folding it shut. I ended up having to slice off 1/8 inch off of each of the cards!

I left Christie's with a huge stack of printed paper and a heavy duty paper cutter and got to work! Christie printed thin black lines for precise cutting, and I cut inside those lines, as close as possible.


It was really important for accurate cutting because of my perfectionist tendencies so they would fit properly in the pocketfold.

I shared the beginning of this process here, and spent 2 nights a week plus saturdays for almost the next month cutting these, a little at a time.

In the end, I cut 6 pieces for every invitation and then for about 25 of them, added California Reception insert.

sis K1 taping the middle insert to the pocketfold.

I realize this makes me look like I force all my relatives to DIY for me, but really I only took a short break for [crappy] pictures!

Finally, just for one last time, the final product!


The last two pictures are a little bit sad to post, because I forgot to take a photo of the set before I sent my own through the mail. You can clearly see the indents and folds from the envelope. But it still gives the idea of how it looked closed.


It's a rainy, yucky day outside, but I've been busy mini-moon hotel booking and working on my photography list

What's your favorite thing to do on a rainy day?

Friday, May 1, 2009

DIY Invitations: The Tutorial I

Well folks, you've seen the invitations, the budget breakdown/supplies--here's how the invitations got made, start to finish:

I asked my talented cousin, Christie, of Paper & Ink Designs to help me with the graphic design portion of the tutorial.    Without further ado, the design process:

Thanks for having me, Katie!  As usual, I enjoyed your company and doing this project with you.  I guess you’d say it was payback for punching out thousands of flowers from construction paper for me for my wedding six years ago*.   So thank you and you're welcome.

*Editor's note: Christie got married in '03 and had lots of fun DIY projects...including asking some of her younger cousins to punch out paper for confetti so it would match her wedding colors :-).

Katie had a pretty good idea what she was looking for in an invitation; the colors were chosen, the outer shell had been found and the verbiage was written.  Now it was time to put that all together.  I had Katie sit down and search through www.istockphoto.com to find the right illustration to accompany her vision.  She was on the fence with a branch, a tree or a leaf, something natural anyway.  Well, she stood by her blog title “The Indecisive Bride” .  

tweaking, tweaking, and more tweaking.  (ps. isn't Christie's baby Izzy so cuuute?)

   After a couple hours of going back and forth finding the “one” (even texting the fiancĂ© “branch or leaf”), we finally landed on a layered illustration of berry branches, leaves and a flower.  We were able to utilize most of the layers, working them in on the invite itself and onto the info cards.  I altered the sizes and colors of each illustration to match the celadongreen in Katie’s color scheme.  I pulled the color from web image of the paper she purchased at Paper Source .  The flower was actually revised to fill the whole stem to create more of a dandelion than a perennial.  I took the top half (because it was layered), copied it and spun it around to fit the entire stem.  It was exactly what Katie was looking for, not too thick and not to sparse

the paper supplies from paper source and paper and more.

The cards on the right were filled with reply information, directions, a map and accommodations.  We utilized the other images on each of these cards, keeping with the natural feel but not overshadowing the over dandelion look.  She had already supplied me with the information, so we just had to organize it.  Each card was sized to fit ¾” above the over, so that all the titles could be seen at a glance.  (In some cases, I’d create all the sizes around the reply card as it may be a postcard with postal regulations or to fit in a supplied envelope.  For Katie, she chose to use her wedding website, an joint email address and a phone number – a more contemporary approach to reply cards, i.e. a way to go green).   

To finish off the invite, I set up small monogram squares featuring their initials.  Katie printed, cut and assembled them with double sided foam tape to give the pocket fold a good seal.  An elegant finish to a beautiful invite!

the monogram that I forgot to photograph actually sealing the invitations!  coming soon.

Being a graphic designer, I work on more advanced programs like Photoshop and Corel Draw.  These programs allow me to manipulate illustrations and images to create the visual needed.  I’m known around my peers for being a fontaholic and sometimes ask people to not watch me scroll through fonts – it gets a little dizzy!  I like a clean sans serif font combined with an elegant, but legible script font on most invitations.  It provides sophistication but a modern edge.  I used the same 2 fonts throughout Katie’s invitation.  I recommend only using 2 fonts asit can get too busy.  If you want, change it up by using the same font in all caps or in all lower case.  This shows more cohesion than throwing a bunch of cute fonts together.

I’ll let Katie take it from here (part two coming next week!)  I really enjoyed this project, as it’s a design that I’d do for myself and love the end product.  It was also awesome to have Katie stay with us for the weekend and spend time with her 2nd cousins.  If you have any questions about wedding invitations or are interested in having me work with you on designing yours, please email me at Christie@paperandinkdesigns.com.  

Wednesday, April 29, 2009

Budget Breakdown: The Invitations

I spent a lot of time with this in excel, but in order to paste it properly I had to make a screenshot of the spreadsheet.

I am very happy with the amount of money I spent on the invitations overall. I tried to gauge what the actual cost per invitation was for me including all factors, so I hope this is helpful for anyone else looking to DIY their invitations. I thought it was sooo worth it, but this was an important piece to me (read: i was a little OCD/wedding inspired) and I had lots of help.
This project was worth it to me--and I realize I could've spent a lot less (or a lot more!) on them. I saved where I felt I could (family design help and no reply card envelope), and splurged (the pocketfold and postage for it)

Please let me know if you have any questions--I'd be happy to answer them!

(oh, the one thing I forgot was $6 for the graphics we used, via istockphoto.com)

Friday, April 24, 2009

Meet my invitation!

Well here's the post I've been waiting for. These are always my favorite blog posts because I love to see other people's invitations, and I can't wait to share mine with you!
I will be doing a DIY and cost breakdown post soon, but here is the completed invitation.

I had more than a glitch or two, and these babies were about 2.5 months in the making and I'm so glad they're gone!

My advice looking back?
  1. Spend the money on the RSVP envelopes and stamps. It's way more fun to get an RSVP in the mail than on your wedding website. Plus, it's classier and better etiquette. I really flubbed it on this one, looking back.
  2. Plan how to address the envelopes at least a month ahead of time, whether you hand-write them, print them, DIY calligraphy, or send them off to a calligrapher
  3. Get your addresses way ahead of time (I sent 5 invites out late bc I was still waiting on people to get back to me with their addresses)
  4. Double the spelling of names and titles (I inadvertently sent an invite to a pastor who recently earned his doctorate degree and did not include "Dr" but "Reverend. oops!)
  5. Get help! I seriously had so many friends and family members that wanted to help. My cousin and I created the design, my sister and BM Rae helped me cut and assemble, My friend Kim helped stamp, stuff and seal the envelopes. I wouldn't have been able to do it without you!!

Without further ado--my invitations!

(I hate to ruin the look, but gotta keep the privacy, ya know?)


envelopes (pre-ugly yellow heart stamp)


The back of the envelopes (I later added a clear address label to the top of the flap.)

(and I am so not a photographer. I'm thinking about asking a friend to take better photos of the invitation suite for my blurb planning album!)

And there you have it!
How long did it take you to DIY your invitations? Was it longer than you thought?

Thursday, April 23, 2009

...and they're [finally] off!

This post should have gone up yesterday but I was too lazy/busy.

On Monday, I sucked it up and bought these, even thought they ruined my envelopes.

and put them on these:


and put them in this box, and in my car.


and drove them over to here, all by myself:


and that's it.
my. invitations. are. in. the. mail!
Oddly enough I don't feel anything too different. The trip to post office was sort of anticlimatic for me. But it's done...and I'm so ready to move on to a different project!
I have been checking the website twice a day to see if we've gotten any responses yet....I can't imagine anyone will have them by today, probably not even tomorrow.


Ok, maybe I am pretty excited!

....now who am I forgetting?

Tuesday, March 31, 2009

USPS, you dissapoint.

I just poked onto the USPS website to see what my options are for my invitations....(preview, DIY steps, and budget will be coming soon!!)

and this is what I found for my 59 cent invites--$60.00 for these?
I have to admit I'm pretty dissapointed. I'm not too picky about the way our envelopes look--I'm not doing a wrap around label (i think), not embossing a design on the flap, not sealing it with a wax seal. But I don't want my envelopes to look ugly.

There are other options...but is it worth it to buy a wedding stamp from Zazzle (many more options) or make my own on either Zazzle or Stamps.com?

(p.s. here's a little sneak peak from the invitations. My monogram designed by Paper & Ink.

or, my favorite E-pic.


Even with online coupon codes, my total goes from $60 to $95 for postage. I've gotta think quick, as I'd need to order these by tomorrow to have them in time to send the invites.
What would you do?

Tuesday, March 3, 2009

What I did this weekend.

See that stack? I have 6 more of those to create....I feel like this has been my new part-time job. How is there still so much left to do?

It's true, what they say; invitations are a labor of love. Because I do love them. (the big reveal is still 6 weeks away...)

Friday, January 16, 2009

invitation wording, WHOA!

WARNING: this is a long an boring post about a very specific topic: how to word and arrange invitations when you are having two receptions. You are completely excused and forgiven if you ignore this post altogether...I just hope it helps someone out!

I posted this in response to this thread, and this one on wedding bee.

I have been very frustrated and dissapointed with the availability of etiquette and wording information for people holding two receptions for a couple whose family lives on opposite ends of the country. (i.e. not a destination wedding or a small private ceremony)

This seems like something that is very common...to have a normal sized wedding/reception in bride's hometown, but groom's friends and family lives on the other side of the country(or out of the country), thus requiring a second reception.

I've by no means made a decision on wording for our invitations yet, but here's what I've got so far.

"...We're having a big wedding here and then a smaller reception out in California just for those who can't travel out. I am finding it so hard to find advice and wording for this because most 2-reception couples have tiny private ceremony or destination weddings and then invite family and friends to the "real party"; where we're having the big reception after the wedding, and just a small dinner party in california.

We have an even stickier situation, because there are about 50 people we are sending both the Chicago wedding/reception invitation and the Southern California reception invitation. In this case, we are inserting an envelope into the Chicago wedding invitations with an invitationto the SoCal reception WITHOUT the announcement (no need for an announcement inside a wedding invitation) . The announcement will go to the other 50 people who were not invited to the wedding.

Also, my parents are hosting my wedding, and his parents are hosting the reception...so I don't think we'll be putting our names first in either the announcement or the orginal invitation...but here are some ideas we're looking at for wording:

Mr and Mrs. Grooms' Parents
are happy to announce the marriage of their son
Groom's Name
toBride's name
daughter of Bride's Parents
on June X, 2009
Please join with us in celebrating their marriage at a dinner party
to be held in XX, CA
on July X, 2009.

OR

Bride's name
and
groom's name
are pleased to announce
they will be marriedon Saturday, june X
with family and friends during ceremonyin Chicago
Please join us for acelebration dinner party
in California
Friday, July Xat 8:00 p.m

OR

The pleasure of your companyis requested
at the wedding reception of Bride&Groom
who were married on June X in Chicago
Friday, the XX of July
at three o'clockLocation

OR

We are delighted to announce our marriage.
Groom and bride exchanged vows
on July 22, 2008 in a ceremony in Chicago
We wish to share our joy with you.
Please join us at XXX for a celebration
Saturday, September 13 Starting at 2pm.

OR for a more caual feel:

Bride and Groom were/will be wed on june X in Chicago.
Please join with them and their families at a reception to celebrate.
Date: April 1, 2005 Time: 7:00 pm for dinner and drinks.Where:The Grooms' houseContact: thehappycouple@wedding.com
RSVP by March 20. We'd love to see you there.


Some links or resources:

http://www.topweddingquestions.com/forum/Wedding_Invitations_C23/Wedding_Announcement_Etiquette_F47/
http://www.lcipaper.com/wording/weddingreception.shtml"

Friday, November 21, 2008

two-reception invitations

my future MIL just emailed me saying that she still hadn't come up with any ideas for what to do for invitations. What to do...

Here is our dilemma:

We are having a rather large (200 people) wedding and reception in the midwest, where I am from (and where a huge majority of our guests are from). My FH and his family are from southern california, and my FMIL is hosting a small dinner party-type reception the month after our wedding for those who couldn't travel (more for friends than family)

We were stuck on how to word invitations, because I didn't want to send wedding invitations to all of my FMIL's friends (and she has LOTS of them), but already some of them were asking when the wedding is and that they would plan on traveling to Chicago for it! We don't have room...so I didn't know what to say.

I bee-lined (no pun intended ;-))it over to the weddingbee boards for some help. After a week of research, here is what I came up with!

-+-We are sending out invitations to all of the people(friends, family, etc) in the midwest for the midwest wedding and reception, as well as close family friends and immediate family of my FH.

-+-We are putting california reception inserts in the invitations of both sides of the immediate family, wedding party and the close california friends.

-+-All of the other friends and more distant family will get a wedding announcement with the california reception insert (we will use the same insert in the wedding announcement as in the midwest invitation)

make sense? Yeah, it took me a while to figure it out too.

Thank you to all of you bees and friends who have gone before me and helped me to handle this invitation situation!


Latte Love All rights reserved © 2008-2011 | I am a HowJoyful Design by Joy Kelley