Showing posts with label diy. Show all posts

Wednesday, June 20, 2012

Graduation party planning: the details

I thought it might be helpful to go through some of the work we did and costs to E's graduation extravaganza. We had an open house for 80-100 (I never did get a final count as people were in an out all afternoon/evening) and we had a friend cater, so the costs were significantly lower that if you'd hire a restaurant.


Seating
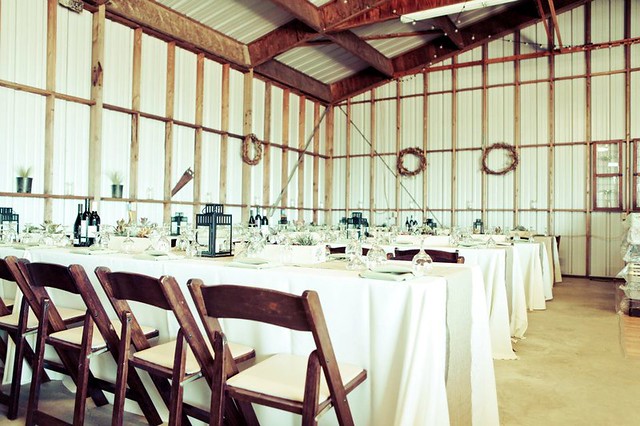
We borrowed the tables, chairs and canopies from our church, which was a huge relief and saved us a lot of money. E and my dad picked up everything on Friday morning and set it up in our backyard.


Food
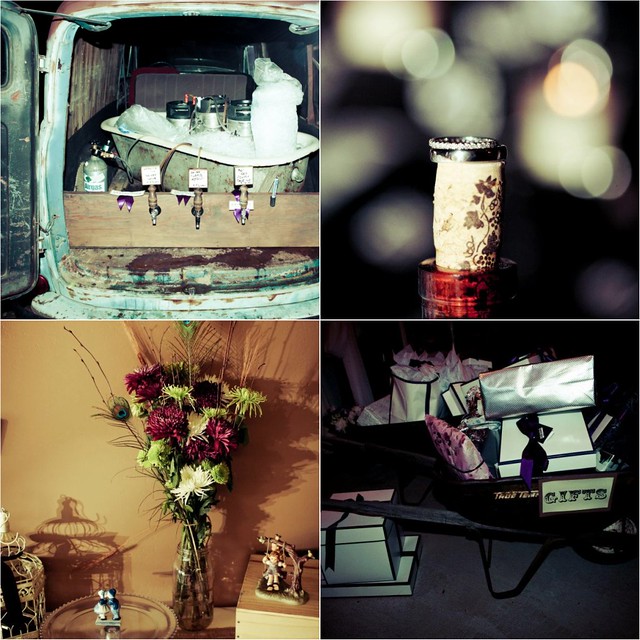
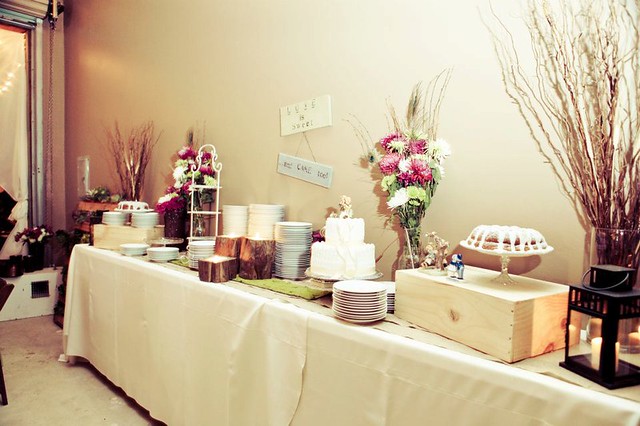
You guys saw these photos (and sadly, I did not get photos of main dishes, or desert), but we did not skimp on food. I wanted a 'foodie' barbecue, and it was the highlight of the party. It was so fun to have everyone be surprised by the lack of typical backyard barbecue food like hamburgers, hotdogs and potato salad, and instead enjoy:

-Baba Ghanoush with pita chips
-Roquefort cheese dip with honey-marinated pears with rice crackers
-Grilled pineapple salsa with tortilla chips
-Smoked haloumi cheese with pickled cherries

-Tri-tip with chimmichurri sauce
-Pulled pork with peach barbecue sauce
-Grilled corn with spicy mayo and cotija

-Brownies with vanilla ice cream and stout caramel sauce

Food for 80 people + tip for our friend: $650
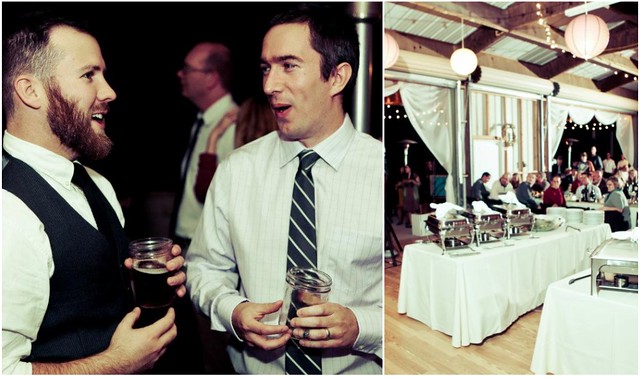

Beer
We picked up a half keg from a local brewery, Stone Brewing Company. It was a hit, but we overestimated how much people would drink. We were drinking flat beer for days after to use it up!
Cost: $110 (our friend got a discount)


Sangria
While E arranged to have beer for most people, I wanted to cover our bases, so I made a large batch of Sangria. We paid a little more than I usually would, so we could get a good Spanish red wine. We used this recipe, but skipped the maraschino cherries and accidentally doubled the sugar (DON'T make this mistake!)
Cost: $38
Time: 20 minutes (+ refrigeration overnight)


Bunting
I made the bunting we used by cutting triangles from a set of  blue fabric quarters from Joann's. I pinned them in double fold binding tape (also from Joann's) and stitched along the top. I had originally planned to put the bunting on a drop cloth wall hung on the canopy, but it ended up being too windy.
Cost = $13 (Fabric: $5, Binding tape: $8)
Time: 2 hours


Graduation caps
I found this idea after Beka pinned the inspiration photo. To keep it easy, I bought blue frosting in a squeeze can which I used attach the pieces together and for the tassel. The tops are fudge-covered grahams from Keebler and the bottom is mini Reese's with mini m&ms to top it off. It took seconds to put together each one and they were a hit, especially with the kids!
Cost: $18
Time: 30 minutes


Chinese Lanterns:
I trolled Weddingbee boards to find suggestions for cheap reliable chinese lanterns. We ordered them from  jadetime.com. The shipping price is pretty spendy ($11 via UPS), but we got 28 blue and white lanterns in three sizes and they arrived in two days.
Cost: $47

Napkin rolling!
Plates, Plasticware, Napkins
The leftover cloth from the bunting was cut into strips and used to tie the plastic ware/napkin sets together. We purchased the plates, plasticware and napkins in large quantity at Costco and only used about 1/2 of them.
Cost: $45
Time: 30 minutes


Total cost for party


Food and tip for our friend: $650
Beer (1/2 keg from local brewery)& Sangria: $148
Decor & Supplies: $168
Rentals (canopy, tables, chairs): free!


Total: $966 (or about $12/pp)

Thankfully, E's parents helped with some of the cost, and my parents and sister put almost everything together the day before and day of! In some ways I feel like we planned and executed a mini-wedding. I hope someone finds this helpful when planning their own graduation party or backyard barbecue in the future. I definitely loved hosting a big party, and I can't wait to find an occasion to do it again!

Friday, June 8, 2012

Graduation celebrations: He/we did it!

To celebrate after E's graduation last weekend we planned a big backyard barbecue. I went with a blue and white theme since those are the colors of his school, and it was the easiest. Here is some of my inspiration gathered on Pinterest.

The main project I worked on was sewing a fabric bunting. It was too windy to use it how I had intended, so we strung it up to the canopy. I used the leftover fabric strips to tie the plasticware together.


Meanwhile my dad and E cleared and set up the backyard


My parents and sister especially did an amazing job helping get things together before the party. It was great to have them in town for a week. My dad attached a surface I made from another cable reel to the big stump in our backyard for a cocktail table - and we loved it so much we left it there!

First, though, was all the graduation festivities. E won an award for academic excellence. :-)


Below is Jeffrey, our 'roommate'. He's one of E's best friends from school and for the past two years we rented out an apartment attached to our garage to him. We have a lot of fun memories, and we're both really going to miss him. (He's the most complimentary dinner guest - always taking 2nd and 3rd helpings!)


Then it was time for the party! For food, we hired a friend of E's who is just a hobby chef and he did an amazing job on the spread. I almost feel like the menu deserves it's own blog post. Completely a relief not having one worry related to the food - although I wish I could have taken credit for it, with all the compliments we got.
I made sangria, and the adorable edible graduation caps with some help.


It was an open house for almost 100 people over six hours. I'm just going to let the pictures do the rest of the talking. I'll do a recap/budget breakdown in another post.


Appetizers: baba ghanoush with pita chips, roquefort dip with honey-marinated pears and crackers, and grilled pineapple salsa


our stump cable spool table in action


The main course was tri tip with chimichurri, and pulled pork with peach barbecue sauce. I cannot even describe to you how good it was. People kept nibbling all night and didn't leave us any leftovers!


The whole party made me appreciate our backyard in a way I don't usually (sometimes it's easy to see the weeds and lawn care instead of the vineyards, hills and greenery). We really have one of the best living situations I could have imagined and I know my heart will be broken when we have to move out of this house! 


It was really wonderful to celebrate with so many friends, family, and church members. Some friends stayed  late and hung out over a bonfire. It was the perfect farewell to E's four years of school.

Monday, March 19, 2012

DIY: cable spool coffee table

spool3

I'm the last person that should be writing this post. I have almost no innate creativity and no experience working with power tools. But in week, I completed a home project I'd found on Pinterest (sadly, with no original photo source) and in the Design*Sponge book, that has been on my wishlist for a couple years.

I'm going to include a light tutorial, but please feel free to ask questions if you have them, and I'll do my best to answer! A friend (you just saw her beautiful wedding) and I worked on this project together. I had the inspiration/motivation to get it started, and she had the space, experience and power tools.

Here's what you'll need (I didn't have ANY of these tools or supplies before I got started. Most of you probably have some tools on hand already, but I'll include everything I used)
  • Electrical cable reel (or spool). We picked up these spools at a local electrical supply company that literally had piles of them lying behind their warehouse. We were permitted to pick them up for free. (total score!)
  • A power sander (like this, or a smaller version here)
  • Cordless drill with screw-driving and drilling bit sets
  • 1 inch spade drill bit
  • Wood stain
  • 2.5 inch screws
  • Compass, or soft measuring tape
  • 8 feet of 1 inch dowel rods (I used 5 pieces cut at 18" each and trimmed them up as needed)
  • level
  • wrench
  • hammer
Ok! here we go.

This is what the spool looked like when I got started.  

(I had already removed a metal plate from the top)

First, hammer down the nails sticking out to make a smooth surface.
Then sand, sand, sand. My goal was to get rid of most of the stamped letters and paint on top and any other imperfections in the wood. I used the electric sander on the surface for probably an hour before it looked and felt like what I wanted. I lightly sanded the sides, the center cylinder, and the bottom up-facing surface, to protect from splinters. Then I took a piece of sand paper and hit some spots around the center hole by hand. 


Once it was completely sanded, I wiped it gently with a damp washcloth, then brushed one layer of Ikea's Behandla wood stain on it. I stained the dowels as well and left both to dry. (Because I was working on this project at my friend's, I came back about 5 days later, but an overnight dry would have been enough.)

spool

When the stain was dry I started marking out where I would install the dowels. This would have been much easier with a compass, so that's what I included above. I marked out 5 places where I wanted the dowels, about 18" apart and measured them halfway in from the edge, which was 2.5". I marked them on the inside of the top, and on the bottom.

spool2

I drilled a 1 inch bevel for the dowel to sit in on the underside of the top (the table was upside down here).  I measured the space carefully and added about 1/8" for the dowel length, and cut it. Placing one side of the dowel in the groove, I used a rubber mallet to hammer the dowel until it leveled evenly. Then I drilled a small hole for a screw through the bottom of the table and into the dowel, and screwed the flat end of the dowel to the bottom.


I did this around each point and then wiped the whole thing clean.


After getting it home, I decided I wanted another layer of stain on the top so I applied that, and then sprayed it with an indoor wood sealant to protect from water stains. 4 coats and 3 hours later, it was finished. (I was ready to bring it inside, but it smelled pretty strongly for 2 days afterwards so it should have probably be left out in a garage for a few days to air out.)

Total cost (to me): $40
Total time: 8 hours

before and after

and then - ta da! We put some of our favorite books on display and I topped it temporarily with this decorative plate and bark balls from Ikea.

spool4

spool2

spool final

Monday, March 12, 2012

New Year's Eve DIY Wedding


Remember my friend's beautiful DIY wedding? I shared a few of my instagram pics of the night here, but now I'm excited to share her professional wedding pictures from Hey Jonny.

My friend Tricia will be posting about a lot of the projects and stories of putting their wedding together on their new blog: http://oururbanfrontier.com/. She and her husband are masters at finding and executing beautiful DIY projects for everything from home decor to gardening.

Before I get to the wedding, I have to start with the transformation they made to the 'shop'for their venue. It was a spare barn on the father of the groom's avocado ranch, and with the help of friends and family they transformed into a perfect wedding venue.

Before
Phil and Tricia Shop

After
403303_10150470355267563_665857562_8770479_796188770_n

Incredible, right? They had a vision for this beautiful wedding, and I'm so excited to share it with you!


Phil and Trish 1

phil and trish 2

phil and trish 4

Picnik collage

phil and trish 5


Phillip and Tricia had their first look at the site of Phil's proposal beneath this beautiful tree at his parent's avocado ranch. Isn't the bench swing he made so beautiful?
404738_10150470403432563_665857562_8770633_944604134_n

phil and trish 6

401119_10150470406337563_665857562_8770651_523543963_n

phil and trish 7

PhillipAndTricia - 171

The ceremony was just before sundown and all of us guests got a gorgeous view of San Pasqual Valley.
PhillipAndTricia - 249

phil and trish 9

phil and trish 8

Then it was time to party back at the shop! During happy hour guests drank mojitos and sangria, three kinds of beer made just for the wedding by the groom's brother-in-law (with the kegs stored in an old tub in the back of an old truck), and kahlua in our coffee, made by the bride and groom. The cake buffet was stocked with homemade cakes from Tricia's girlfriends (I made a lavender lemon bundt cake). Gifts were collected in a wheelbarrow in front of the guest book table.

A live band made up of classmates of the bride and a professor kept the dance floor going well into the night. (see if you can spot E and I in that last photo!)
PhillipAndTricia - 311
PhillipAndTricia - 345

phil and trish 10

395494_10150470426592563_665857562_8770699_1985550762_n

my dashing husband :-)
phil and trish 11

394083_10150470426107563_665857562_8770695_61460366_n

396431_10150470442362563_665857562_8770827_529116353_n

There really was not a detail in this wedding without a personal touch. It was breathtakingly gorgeous, immensely fun, and very them.

Hope you enjoyed!

Photos: Hey Jonny
Catering: Terry at La Farfalla
Everything else: Bride, Groom, Family and Friends!
 

Latte Love All rights reserved © 2008-2011 | I am a HowJoyful Design by Joy Kelley